Showing posts with label diy. Show all posts

Tuesday, 25 June 2024

Painting and Painting

Since we arrived in Moss Side five years ago the inside of the house has been well decorated. I have had my eye on the tatty entrance porch for quite some time and a week off with some sunshine was the perfect moment. The front door and front window have been re-caulked and the step painted brick red.
I used the blue that I bought for the yard to do the porch walls, and I am delighted by how the colour brightens the entrance, and dare I say it, the whole street. Several neighbours stopped by as I was working and commented how lovely it is.
Of course as soon as I painted the surrounding brickwork I realised I would have to do the whole front of the house as it showed up how faded the old paint was. Fortunately it had only been previously painted to the top of the downstairs window and so I could reach it all from the stepladder. 
Saturday I took myself to a Japanese Painting Workshop with Floating Art , spent an enjoyable couple of hours that flew by and was surprisingly satisfied with the results.
Stay safe. Be kind. Try something new.

Saturday, 16 May 2020

100 Days - 20th day Houseiversary

Today is my houseiversary, a whole year since I got the keys to my very own house. I have pretty much fulfilled my challenge to myself to get the whole house painted within a year (Toby helpfully closed the door to the under-stairs cupboard so I didn't have to be reminded of the one little space left to paint). I continue to arrive home from work to a deep sense of contentment and security. Much as their inability to use the recycle bins properly drives me crazy, the neighbours all seem lovely, and none of them owns a noisy dog or plays loud obnoxious music. All in all I am satisfied that I made a good decision.


Stay safe. See you tomorrow.


Monday, 30 March 2020

Decorating my butt off

As you can see I have never been very hot about covering stuff up while I paint. There are little smudges on the carpet in various corners, but mostly it all washes off in the end. I was determined to get to the end of the job so that I could actually enjoy being in the house, and maybe plant some stuff outside this year. Much debate has ensued about the kitchen. We had decided on yellow, but then my mind drifted to the pink spectrum and wanting something really bold. So we agreed on both (well to be honest not sure the girls cared that much)! But how to combine the two. Who wants just a plain old alternating walls thing? (It looks pretty messy but you get the idea):
Monkey suggested the diagonal lines (and we drew a plan of how to lay out the stripes), and I think it worked out fabulous. At the other end of the room I added the magnetic chalkboard paint, to create a notice board cum shopping list cum poetry collection (Monkey bought me revolutionary magnetic poetry for Christmas):
I am going to use the left overs to do the cupboard under the stairs, the only space currently unpainted.

At the front of the house I used my week off to finally get down to the rest of the living room. The back half had been completed last summer, transformed from this:
to this, including the lovely new curtains:
I did have to paint over the previous family's hight chart, that showed the growth of their kids for the years that they lived here. It was kind of sad, so I photographed it for posterity:
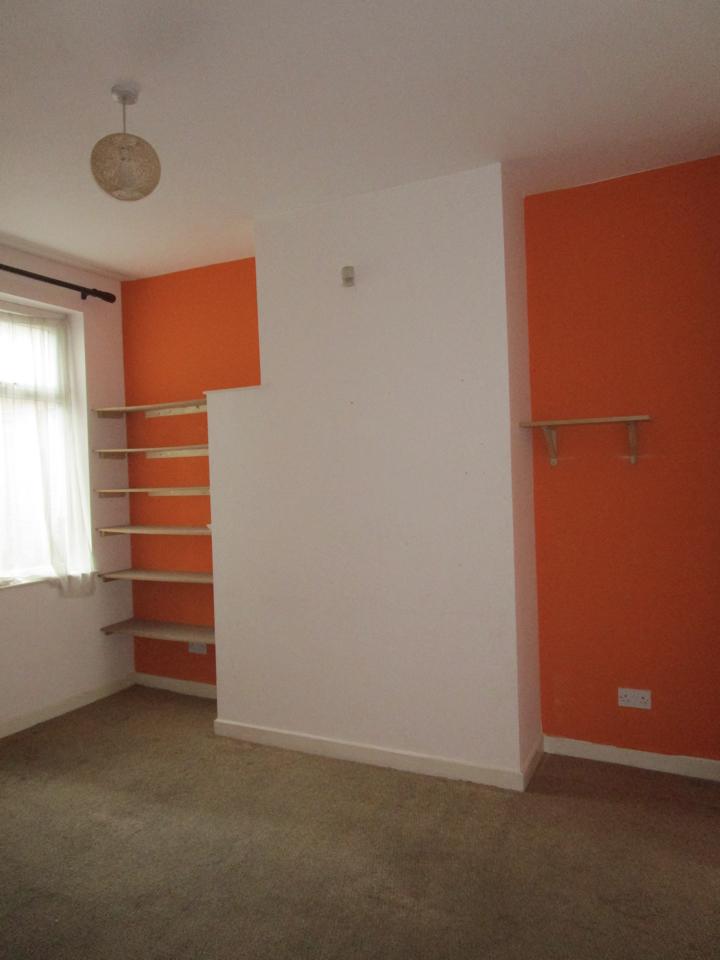
There was yet more orange to cover in the front:
down to the last tiny bit:
and more red to add:
though I had to mess up the other room in the process:
Tish and I swapped over the two storage units. She now has the big one in her room and the smaller white one came downstairs. I have stashed a load of stuff in the loft so that we can actually use the room, have all the craft stuff tidied away:
and a nice space in the middle to exercise in:
with a cosy nook by the radiator for people who feel the cold:

All in all I am very pleased with the outcome. I am glad we decided to treat it as one room, even though I have fabric to make a dividing curtain. It is still a bit of a dumping ground as there is no other space for the hoover and airers, but we will work on that. Little jobs remain to be completed: I realised I had not painted the space around the window in the back room, and I have plans to put up the mass of fairy lights in the front room ... but whatever, one of us might get ill so we have to isolate and then I'll have all the time in the world.


Monday, 9 December 2019

Freebie Decorating

I made a plan when at my sister's house to try and get the decorating of the house finished by the time we have been in the house a year. I don't want to project to just hang there for several years, with the piles of decorating stuff occupying the kitchen side and window sill. The front half of the living room is a bit bogged down with stuff so I decided to tackle the hallway. The money situation is not that good so decorating on the cheap became the way to go. As a result I decided to bring out all the bits of left over colour from the bedrooms. Tish's bedroom colour had the most left so it has gone down the hall, up the stairs and along the landing. The orange that dominated the downstairs took a couple of coats of undercoat but it has covered beautifully.
 I took the white up the side wall to keep the space from being too dark.


Tish and I picked out this fabulous bright red for the bannister on our first trip to B&Q. It is oil based so much more troublesome to apply and dry. 
I was not worried about whether it would clash with the purples:


On the landing I used the much smaller bits left over from mine and Monkey's paints:
And the art wall that we had started in the last house has become something more permanently fixed to the wall:
And having invested about £10 on some charity shop art books we have gradually covered the gap between the colours over the last week or so. It may be protected with varnish at some point, but not having small children any more means it shouldn't get picked at and vandalised:

 The ceiling was a bit of a challenge, but I didn't fall down the stairs once:

This was 2.5 litres of satinwood that has so far done all the woodwork in the house. It finally expired so the bedroom doors and frames have not been finished, and the cupboard on the landing may yet get the bright red. The panelling round the upstairs bannister is not done ... but you know what, I am not beating myself up about it, and will get around to finishing over the next couple of weeks.

My new favourite painting, it is called 'After the bath, woman drying her left foot' by Edgar Degas.


Tuesday, 15 October 2019

Home Making part 8 or 9: Meet Lyra

More house stuff. I put off taking down the tatty net curtains from the front window for several months because of being exposed to the street. Problem solved with this window film; you can get all sorts of fun designs these days but this one is faceted and makes rainbows in the front room when the sun shines in:
and looks like this from the outside in the evening:

We had been cat-less for more than a year, putting off adopting until we were settled in the new house. Monkey and I went up to Rochdale RSPCA centre after Julie had seen an elderly one-eyed cat in the adoption centre at Pets at Home. Sadly he was already taken when we visited so we spent an hour or so meeting all the other cats waiting for new homes.
We could have taken any (or all) of them but Monkey fell in love with Lyra:
partly because she is a shoulder cat:
and we got her just in time to help with the curtain making:
The living room is kind of done but not finished or tidied up so I have not posted photos, but we bought this fabric from Abakhan:
and here are the lovely curtains that I made:
And these are the lovely outer space curtains Monkey made for her bedroom:
I spent far too many weeks making a new duvet cover, patchworked with silk remnants and some sari yarn and backed with brushed cotton so it is lovely and cosy:
And then the other day my bedroom door conspired to prevent me going to work and Tish had to barge it open and rescue me. This confirmed a vague plan to replace it with a curtain. I rummaged through the stash and gathered all the remnants of velvet and patched them together, and lined it with some leftover quilting:
I am sure lots of people have a home without a pet, but having one is so friendly. Lyra definitely likes to climb, and look outside, so a nice climbing tree is next on the list.

Saturday, 28 September 2019

How to lay a linoleum bathroom floor

The bathroom was totally bearable, ordinary, white, bland.

Step 1: Cover up that white with some really fabulous green paint. And fix the towel rail that was hanging off the wall:

Step 2: Some time later get around to mounting some lovely bamboo boxes and a mirror:

Step 3: Pull up the old vinyl flooring and find disgusting stuff underneath. Also remove the old bath panel and chuck it out. Scrub the floor with bicarb and vinegar to get rid of pee smell (it works pretty good). Live with it like this for a while (this is so you will appreciate the loveliness that is to come) (don't forget to keep the old vinyl for later):

Step 4: You have to level the floor. I got a quote for levelling the floor and laying the lino, it was £250 and they said I would have to have the sink and toilet taken out too. At this point I decided I could definitely do this myself. Half of my floor was already covered with a sheet of hardboard, in reasonable condition, the rest was floorboards. I chopped up bits of hardboard to patch and cover the floorboards. Nail the pieces down with 19mm annular nails (these are designed to not pull out easily and you don't really want them going through the floorboards in case there are pipes underneath). There are some useful guidelines here on the B&Q website, though I didn't follow the instructions religiously. Take care not to cut the end off your thumb with the Stanley knife or it will delay your progress considerably. Go over the floor and make sure the nails are nice and flush with the surface (I missed a couple and the little bumps annoy me but I am working hard at not beating myself up about it):

Step 5: Lay out your linoleum in the living room (it will smell really nice). This is an all natural product made from linseed oil, cork dust, wood flour and calcium carbonate, backed with a hessian type material. It is called Marmoleum by Forbo but I purchased it from UK Contract Flooring. They were very helpful and Frank emailed me with advice and support several times while I agonised about whether to try and fit it myself. It came on a huge cardboard tube that is going, at some future date, to become part of a massive cat tree we are going to build for Lyra (did I mention the cat at all yet, maybe not?):

Step 6: The linoleum needs to sit and come to room temperature for at least a day, then unroll. It has to be back-rolled and then gently massaged to flatten it out. Do this very carefully and do not lean on it or fold it as it will crack and be spoiled. I probably did not do this enough as mine did curl and lift very slightly after laying. Be very wary of any instructions for laying vinyl flooring; linoleum is a completely different substance and is not as flexible:

Step 7: As advised somewhere I purchased some concave curved blades for the Stanley knife, they work much better for cutting linoleum. I used the old vinyl flooring that I had taken up as a template and marked out the shape to cut. Do this carefully and remember to have the two layers the same way up, otherwise you will find you have cut your flooring back to front (I double checked this about three times). Allow a little extra all round, you can trim down but not stick it back on when you have cut it off. I cut the basic shape but not the holes for the sink and toilet. Fortunately for me the new bath panel came in a huge cardboard box that I used to cover the floor so I could safely cut the linoleum without risking damaging my carpet. Not sure how you might handle this otherwise, just improvise:

Step 8: Remove the bathroom door, it will be completely in the way. Carry the linoleum up and lay it in the doorway. I pulled it into position and carefully trimmed it round the doorway and into the corner. Again take care not to force it as it does crack quite easily. You can literally carve off small layers from the edge until it lies down neatly:

Step 9: Now cut out the shapes for the sink and the toilet. This involved a lot of gently putting it into place, seeing where it needed trimming, gently easing it up again and trimming a few millimetres off and gently putting it back down again. You will fuck it up. But you know what, in the grand scheme of things it will be fine and still look fabulous. I patched a little space at the front of the sink pedestal and you'd never know it was there, and the toilet is pretty damn near perfect:


Step 10: Glue it down. No photos of gluing process, too busy gluing. I bought some Evo-Stick flooring adhesive from Travis Perkins (mainly because it came in a smaller tub than the official stuff). Spread the glue over the half of the floor farthest from the door then lay the flooring and press into place. Get your assistant to hold the linoleum out of the way and spread glue on the second half and complete the process. You are supposed to roll it with a weighted roller but we just walked around on it and rubbed it with some blocks of wood wrapped in towels, making sure to go all the way to the edges. We did this for about 20 minutes or so until we got bored. I should have thought to put piles of books or something heavy down while it dried, there is some (very) minor curling by the bath that I am also not beating myself up about:

Step 11: Plan your new bath panel. I bought a plain flat bath panel made of painted hardboard (also from Travis Perkins) that had to be cut to size. Tish came up with the brilliant suggestion of making a template using some of the cardboard packaging, this saved me huge amounts of struggle as I could cut the panel to the right size first time:

Step 12: I bought excess linoleum because I wanted to create a more interesting bath panel, so having cut the panel to size I glued it to the linoleum and left it to dry overnight, weighted down at both ends to ensure no curling:

Step 13: Next morning trim the excess linoleum around the edge of your bath panel. Slot your new fabulous bath panel in to place. I was going to screw a framework to the walls and attach it properly but it seemed like a whole lot of faff so in fact the bath panel is held in place by the fact that it is edged with clear silicone sealant:

 Step 14: I bought some small tubes of clear sealant and did the entire room, all edges of the flooring, around the toilet and sink and around the bath panel. It smoothed off very neatly and is barely visible:

Step 15: Since I am trying to do things properly I spent two hours cutting away all the old mouldy sealant (see the top photo, it was pretty bad) and replaced it. Unfortunately I bought clear rather than white by mistake (this had been bought on our first trip to B&Q back in May) so it does not cover as nicely. I also bought grout reviver and spent another hour scrubbing the grout and then colouring it white, and that looks just brilliant:

Step 16: I also added a strip of linoleum on the other side of the bathroom where the pipes have been boxed in. I rubbed down the rusty radiator and painted it (though the rust is peeping though so I may have to find some kind of rust treatment stuff) and put a second coat of paint on the skirting, doorframe and the door:

And now it is a fabulous bathroom that brings me joy every time I go in: